Looking for a Pet First Aid Course?

The human found an online pet first aid course!

We guinea pigs tend to be awkward creatures, with strange injuries. The human has navigated broken toe nails, hay in eye attacks, sore paws, pulled stitches, allergies, and more. Now, while the scope of this course focuses on dogs and cats, first aid information is invaluable. You never know what trouble a pet might get into!

The human tried to get me to learn too…
prophtauntaun
No human, it is your job to learn to take care of me!

Have you ever wondered when you absolutely need to take your pet to the vet? Are there situations you can handle at home? Or are there things you can have on hand to help in emergency situations so you can get your pet to the vet? Or wanted to learn this kind of stuff but don’t have time to actually go to an in person class?

If so then check out Pro Pet Hero!

prophhomepage

The human really liked that the course is taught by a certified veterinarian named Dr. Bobbi Conner. She presents the information clearly and consciously, and demonstrates key skills. First you watch training videos, after which you take a test to demonstrate what you learned, and when you pass you get a certificate you can print. Very useful if you are a pet sitter, dog walker, or other such profession so you can prove your training to clients. The course is well priced for information that could save your pets life, or your sanity, depending on the situation. Some of the big topics covered include dog cpr, creating a first aid kit, poisoning, itching, vomiting, how to measure vital signs, and many other health topics.

You can take the course from wherever online, what ever time of day you are free, and at your own pace. The human was able to start the course and complete it later on over the course of a couple days as she had time! The site also offers a weekly refresher email so that you can keep up on your skills over time.

The website explains the process like this:

howtoproph

The human is interested in getting a puppy soon, and now she feels much better equipped to deal with dog care and health. If you have a pet, work with them, or are considering one this course is a great opportunity to learn valuable skills! prophlogo

My human is certified, are you?

Check out Pro Pet Hero!

Easter Nail Art

Nail art is all the rage these days! Well, at least if you have been following that trend on the internet. Some of the designs that people come up with are very intricate and require advanced skills. Don’t know anyone that skilled at painting both hands, (maybe most don’t or have someone to help paint the other hand?) so here are some cute beginner designs for Easter/Spring. Good luck!

A couple tips:
1. Make sure your base layer(s) are dry before adding details.
2. Use dotting tools, nail art pens, or thin detail brushes to add details. Some people create designs with brushes and acrylic paint instead of nail polish.
3. Depending on design you may have to let some portions dry before moving on to make sure you don’t smear or rub off tiny details.
4. Always apply a top coat to protect your design!

Bunny Designs

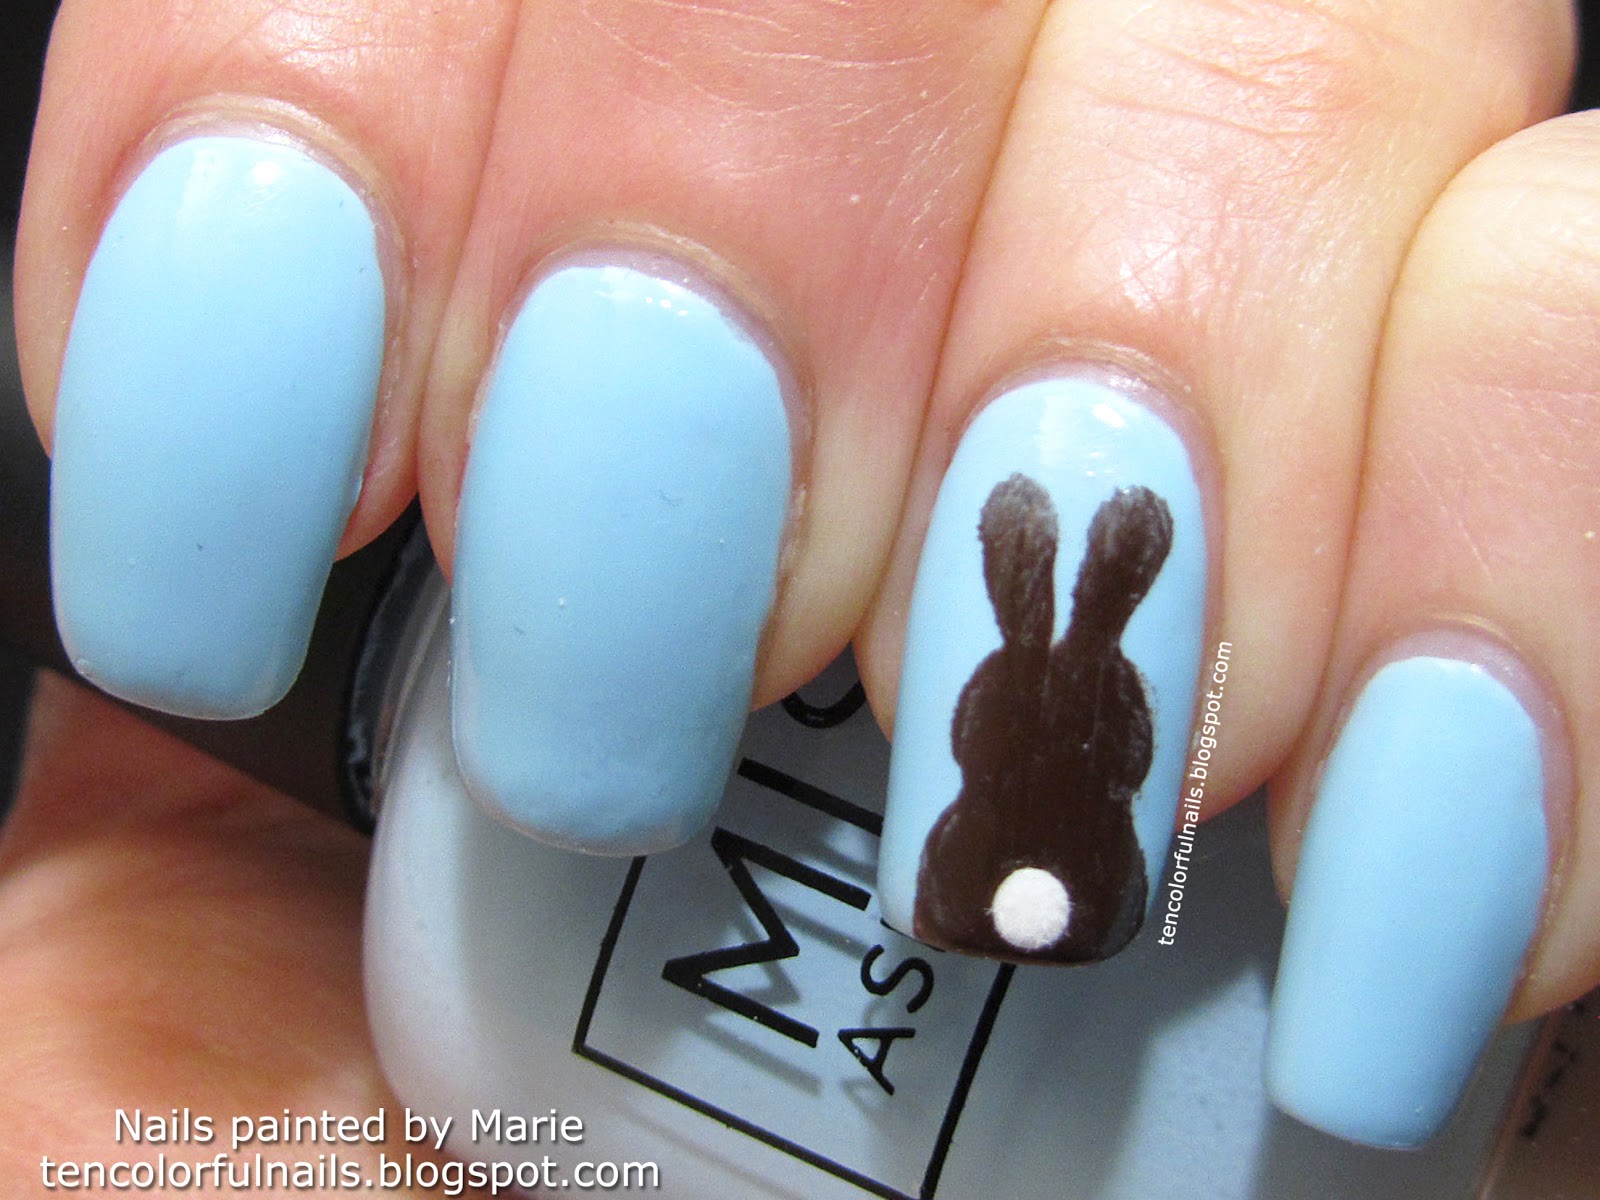
Chocolate Bunny or a bunny from the back:
Chocolate Bunny Nail Art sideview for blog

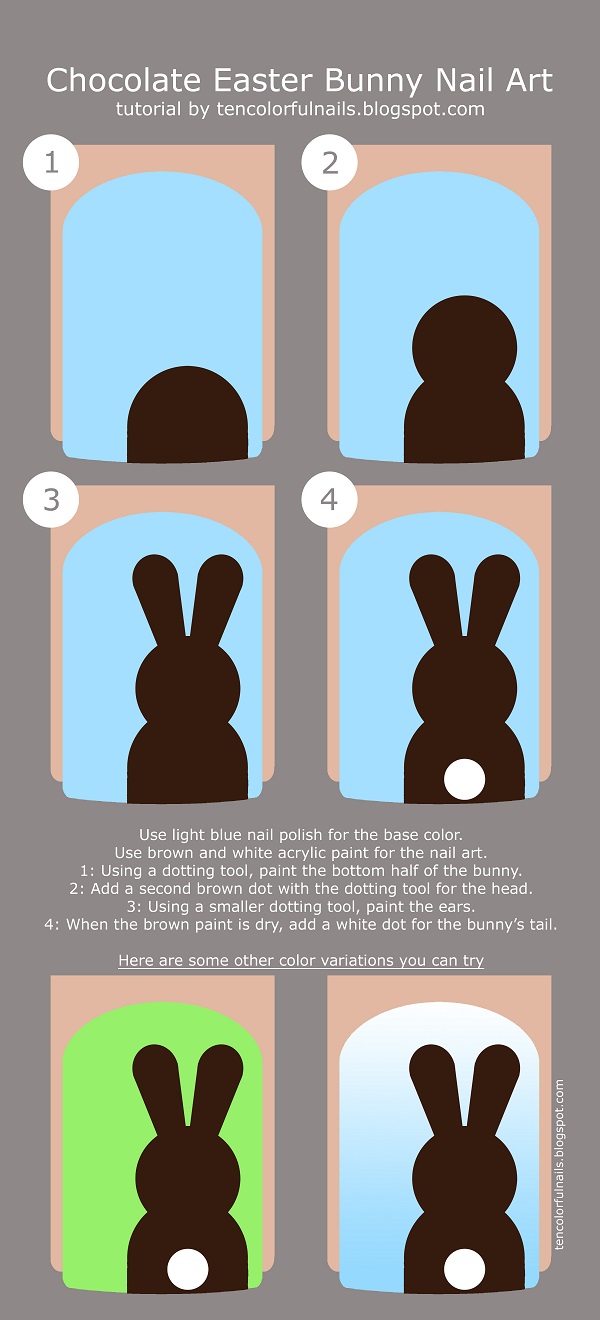
The Ten Colorful Nails blog even added a tutorial image on how to paint this bunny:
Chocolate Easter Bunny Nail Art tutorial
(Ten Colorful Nails)

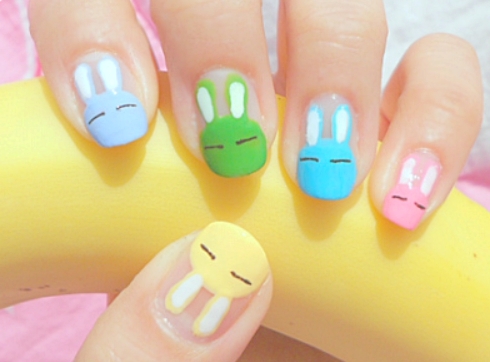
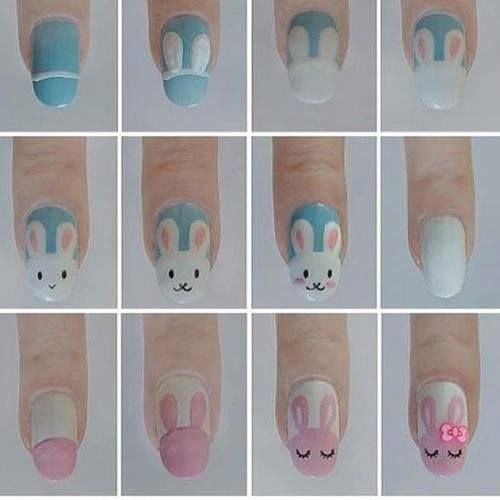
Bunny Faces:
tumblr_loya4z76Ki1qidveyo1_500
(weheartit)
These are cute and easy, look great in multiple colors, and have very simple eyes and ears.

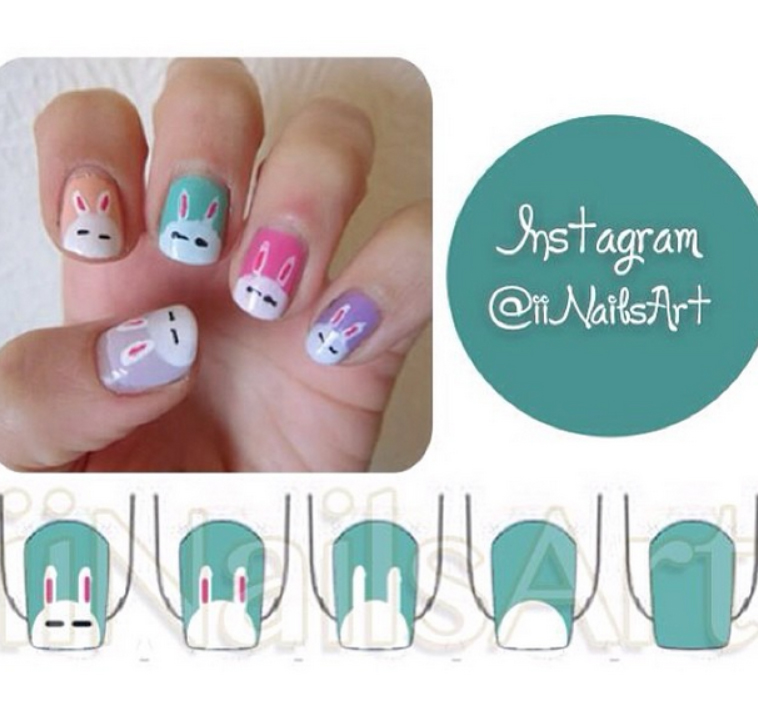
Here is a tutorial on this kind of face:
bunface
(iinailsart)

Another similar bunny face with larger ears:
tumblr_n2q0ypydIf1tsyouzo1_500
(tumblr)

Chick Designs

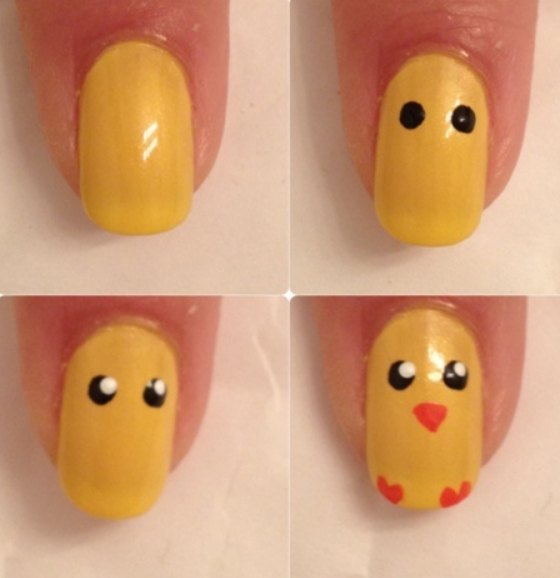
How to paint your entire nail as a chick:
howtochick
(pinterest)
This is pretty simple! Nail all one color, then you just have to paint on the eyes, beak, and feet.

Here is a video from MissJJan showing this process and how to make Easter eggs:

Chick with egg shell:
chicknails
(pinterest)
This adds another layer to the design, a bit more intricate and interesting. It would be cute to have a mix of chicks – two shells, one shell half, no shell at all.

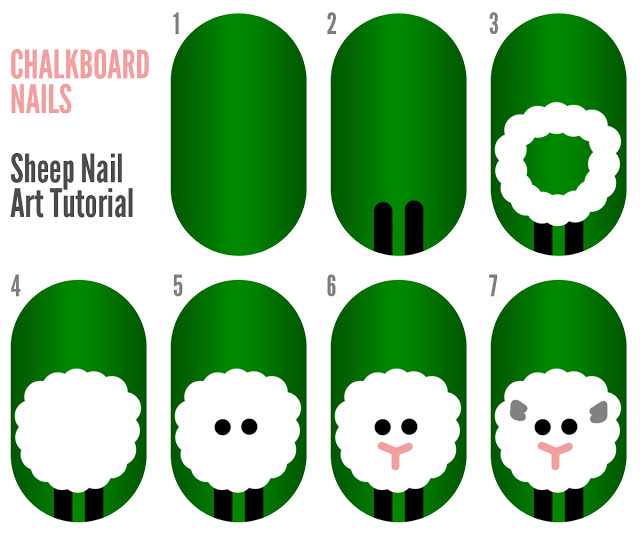
Sheep:
SheepTut
(blogspot)
I think this is a great example of how to paint a sheep on your nail, something a little different but still very related to Easter!

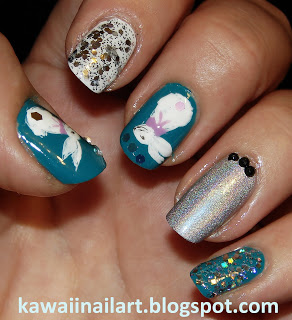
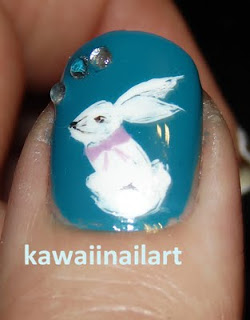
Of course, for those who can have more advanced bunny painting skills:
bunny hand holographic nail art 2

Just look at that bunny!
bunny thumb nail art
(Kawaii Nail Art)

Hope you guys give it a try, I know my human is going to. Silly though, because everyone knows that guinea pigs are far superior to rabbits!
– Fizz

Cute Christmas Cookies

I love to make Christmas cookies, and there are some adorable recipes to choose from. Here are five cute recipes that you can make use of this holiday season.

Each has a link to the page where I found the recipe, in case you would like more detailed instructions and more pictures.

1. Reindeer Cookies — pillsbury.com
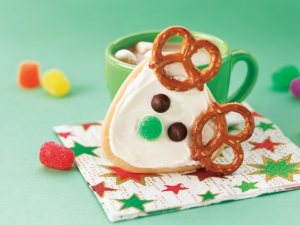
This recipe makes 32 cookies and takes a total of 55 minutes.

Ingredients:

1 roll (16.5 oz) of Pillsbury refridgerated sugar cookies

1/4 cup  all-purpose flour

1 cup vanilla ready-to-spread frosting

64 small pretzel twists

64 semisweet chocolate chips (about 1/4 cup)
16 gumdrops, cut in half

Directions:

1. Heat oven to 350. Break up the cookie dough in a bowl, add flour until blended. Roll dough into a log, and then make into a triangle shape.

2. Cut dough into 32 triangular slices – 1/4 inch thick. Place 2 inches apart on an ungreased cookie sheet.

3. Bake 7 – 11 minutes, or until set. Cool for 1 minute and then move to cooling rack. Cool completely – takes about 15 minutes.

4. Frost the cookies with frosting. Place two pretzel twists on each triangle near the corners for antlers. Press two chocolate chips into the frosting to make eyes, and 1 half of a gum drop to make a nose.

To store: place between sheets of wax paper in a tightly covered container.

2. Jolly Santa Cookies — bettycrocker.com
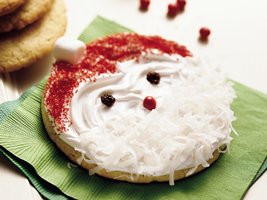
This recipe makes 18 cookies, and takes a total of 1 hour 50 minutes.

Ingredients:

1/2 cup butter, softened

1 cup granulated sugar

1 teaspoon grated lemon peel

1 egg

2 tablespoons milk

2 cups all purpose flour

1 teaspoon baking powder

1/2 teaspoon baking soda

1/2 teaspoon salt

1 cup plus 2 tablespoons vanilla frosting

3 tablespoons red sugar

18 mini marshmallows

36 chocolate chips

18 red cinimon candies

3/4 cups shredded coconut

Directions:

1. Heat oven to 400. Beat butter, sugar and lemon with an electric mixer on medium, or with a spoon. Stir in egg and milk. Stir in flour, baking powder, baking soda, and salt.

2. Place dough in rounded teaspoonfuls full 3 inches apart on ungreased cookie sheet. Use the bottom of a drinking glass to make each about 1/4 inch thick and 3 inches in diameter. Bake for 8 – 10 minutes or until light golden brown. Move immediately from sheet to wire rack. Cool completely – about 30 minutes.

3. Spread frosting on one cookie, then sprinkle red sugar over the top 1/3 of the cookie to make Santa’s hat. Press on a mini marshmallow for the hats tassel. Press 2 chocolate chips for eyes, and 1 Cinnamon candy for nose in the middle third of the cookie. Then sprinkle the coconut on the bottom third of the cookie for Santa’s beard. Decorate one cookie completely before moving on to the next so that everything sticks.

3. Marshmallow Snowmen — Better Homes and Gardens
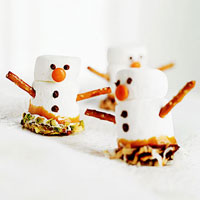
This recipe makes 26 cookies and takes a total time of 1 hour 20 minutes.

Ingredients:

12 vanilla carmels, unwrapped

3 tablespoons sweetened condensed milk

1 tablespoon butter

1 10 ounce bag of marshmallows

53 pretzel sticks

1 cup chopped pistacchios, toasted coconut, toffee pieces, and/or 1/3 cup nonpareils

4 ounces bittersweet, semisweet, or milk chocolate pieces

2 tablespoons shortening

orange colored mini candy coated chocolate pieces or other small round candies

optional: marshmallow cream to stick together marshmallows if they do not stick on their own.

Directions:

1. Line a baking sheet with foil, butter the foil and set it aside. In a small sauce pan combine the carmels, condensed milk, and butter. Heat and stir over medium low heat, until melted and smooth.

2. Use kitchen scissors to cut 1/3 of the marshmallows in half crosswise. Place the marshmallow half sticky side down on top of another whole marshmallow to form the head and body. Press gently together to get them to stick, use marshmallow cream if needed. To make arms – stick two pretzel sticks into each side of the whole marshmallow.

3. Dip the bottom 1/3 of the snowman body into the carmel mixture, allow excess to drop off. Place onto foil.

4. Put pistachios, coconut, toffee pieces, and/or nonpareils into separate bowls. In another sauce pan, combine the chocolate and shortening. Heat and stir chocolate mixture over low heat until melted and smooth.

5. Dip the caramel coated end of each snowman into the chocolate, enough to cover the caramel. Allow the excess to drip off, then dip into one of the bowls of pistachios, coconut, toffee, or nonpareils. Put snowman back on baking sheet, and let stand for 30 minutes or until the chocolate is set.

6. If necessary, remelt the chocolate over low heat in a sauce pan. Put the snowmen onto their backs to finish decorating. To make eyes and buttons, dip one end of a pretzel stick into the chocolate and then dab onto the snowmen. To make a nose, dab on some chocolate and attach a small piece of candy. Let stand until dry, about 5 minutes.

4. Santa Hats — Disney Family Fun
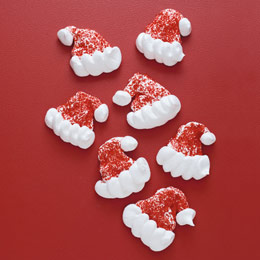
Makes 2 dozen santa hats.

Ingredients:

2 egg whites, at room temperature

1/2 teaspoon cream of tartar

1/4 teaspoon vanilla extract

1/2 cup sugar

red colored sugar

Directions:

1. Heat oven to 200 degrees F. Beat the egg whites with an electric mixer until soft peaks start to form. While continuing to beat the mixture, add the tartar, vanilla, and then slowly the sugar. Continue to beat until the peaks are stiff.

2. Line a baking sheet with parchment paper. Spoon the meringue into a quart size plastic bag. Snip off a corner and pipe 2 dozen 1 and 1/2 inch tall santa santa hat triangles onto the parchcment paper. You should have about 1/4 of the meringue left.

3. Sprinkle the triangles with the red sugar, and then use the remaining meringue to make the pompom on the end of the hat and the trim. Bake the hats until hard but not brown, about 1 hour and 2o minutes. Turn off the oven and then leave inside the oven for another hour to crisp the cookies before removing.

5. Penguin Ginger Bread Cookies — The Crafty Penguin
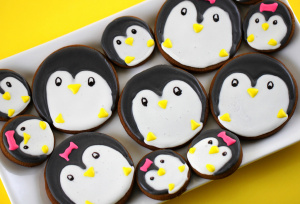
This receipe reuires you to make the cookies and then gives detailed instructions on how to decorate them.

Ingredients:

3 cups all purpose flour

3/4 teaspoon baking soda

1 and 1/2 sticks salted butter

1 cup packed dark brown sugar

5 tablespoons molassess

3 tablespoons water

2 tablespoons ground cinnamon

2 tablespoons ground ginger

1 teaspoon ground cloves

1/4 teaspoon of ground pepper

Making the cookies:

1. Cream butter and sugar until fluffy.

2. Add mollassess, water, cinnamon, ginger, cloves, and pepper – mix until combined.

3. In a seperate bowl whisk together flour and baking soda. Slowly add to batter in three parts, mixing after each part is added.

4. Roll the dough until 1/4 inches thick between sheets of wax paper. Refrigerate 30 minutes. Then cut into circles and refrigerate another 30 minutes before baking. You can make circles of varying size, but bake those of the same size together.

5. Bake for 8 to 10 mintues at 400 degrees F on a parchment paper or Silpat lined baking sheet. Once cooled, the cookies can be decorated.

To Decorate:

Recipe for royal icing

How to decorate — scroll down to the decorating section, includes pictures

Be aware that this will take a long time because once the black icing is done, the cookies have to dry overnight before the white icing can be done.
How to: Make Penguin Cupcakes

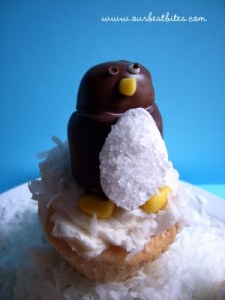
Today I discovered the blog Our Best Bites, which has an article with all the steps required to make cupcakes topped with candy penguins. These little guys will be the hit of the party!

The receipe includes only easy to find ingredients and does not require that you be the best chief. This is a great cooking project that can be done all in one sitting or put together in steps, or is a good project you can work on with your kids.

Candy Penguin Cupcakes
By Our Best Bites

Ingredients:
Unfrosted cupcakes, any flavor (I use the recipe from this tutorial, but you could easily use unfrosted cupcakes purchased from a bakery)
White frosting (I use this recipe)
Coconut
1 bag of large marshmallows
Sanding sugar, white sparkly sugar, or white sprinkles
1 bag of semi-sweet chocolate chips
2 Tbsp. shortening
Candy corn
Trolli Gummi Strawberry Puffs (I just found these in the candy section at Wal-Mart)
1 cube almond bark
Yellow and orange Starbursts

Supplies:
–1 pair kitchen shears
–Some kind of foam, preferably floral foam
–Bamboo skewers
–1 large Ziploc bag
–2 small Ziploc bags (snack size is perfect)

The process to make these little guys is quite involved, but not overly difficult. The total time to make 24 of these guys, if you do everything in one go, will take around 3 to 4 hours.

Below is an excerpt from the site of how to make these guys, for more complete directions (including helpful pictures) please see Our Best Bites: Tutorial: Candy Penguin Cupcakes.

Brief how to:

1. Combine chocolate chips and shortening. Heat in the microwave, stirring about every 30 seconds, until the chocolate is completely melted.

2. While chocolate is melting, insert a bamboo skewer about halfway into a flat end of each marshmallow. You can stick these into the craft foam while you wait for the chocolate to continue melting.

Note: It is best to work at making 6 penguins at a time so that the chocolate does not harden before you are done.

3. Work quickly to dip each skewered marshmallow into the chocolate, tap the skewer onto the side of the bowl a few times to remove excess chocolate. Place the skewer holding the dipped marshmallow into the craft foam so the chocolate can dry without touching anything.

4. When you’ve dipped about 6 marshmallows, wash your hands thoroughly to remove any chocolate. Pour a small amount of sanding sugar/sparkly sugar/sprinkles onto a plate.

5. To Make the Penguin’s White Tummy: Using your kitchen shears, carefully cut a thin slice (about 1/8″) of marshmallow. Then, dip the sticky side (or just one side if both sides are sticky) into the sanding sugar and then carefully place the non-sugared side onto the dipped marshmallow (The melted chocolate will hold the marshmallow slice in place and the sanding sugar will keep anything from sticking to his tummy). Repeat with remaining dipped marshmallows.

6. To Make Penguin Feet: Take two candy corns per penguin and place them directly above the penguin’s tummy, on the round bottom of the marshmall. Have the fat, yellow end poking out over the edge of the marshmall and the small white ends forming a “V” together. The feet will stick out at an angle with only the yellow of the candy being visible.

7. Let the half-penguins dry.

Note: This is a good place to stop and continue at another time if desired.

8. Ice your cupcakes. Fill a large Ziploc bag with icing and then cut about 1/2″ off the corner, squeeze the icing onto the cupcakes. Then spread the icing out with a knife.

9. Place a penguin body on each iced cupcake.

10. For Snow: Gently press some coconut around each penguin body. If you’re allergic to or don’t like coconut, you could also use some more sanding sugar instead of the coconut.

11. You’ll probably need to reheat your chocolate at this point. Heat it until it’s liquid and then give it a good stir.

12. To make the penguin heads: Dip each Trolli Strawberry candy into the chocolate and then twirl it a little to remove excess chocolate. Carefully place the dipped candy onto the penguin’s body, the oblong side directly above the penguin’s tummy (this will be his face).

13. Wash your hands really well again to remove chocolate.

14. To Make Beaks: Carefully cut off a small piece of the Starburst (maybe a 1/8″ corner) and then form it into a beak between your fingers. Carefully place it in the middle of the penguin’s face (the chocolate on the head will still have to be warm for this to work).

15. To Make the Whites of the Eyes: Heat the cube of almond bark in a ziplock bag in the microwave for 1 minute, checking it every 20-30 seconds (and mashing it around with your hands a little each time), until the bark has melted. Then cute a small hole in the bag, and squeeze two eye blobs above the penguin’s beak.

16. To Make Pupils: Place dipping chocolate in ziplock bag, reheat a bit if necessary, cut a small hole in the bag, and place a small dot onto the whites of each eye.

17. Allow all the penguins to dry and then enjoy!

As I said above, please see Our Best Bites: Tutorial: Candy Penguin Cupcakes for full directions, complete with pictures and additional helpful tips.